Top Hidden Features in Lightroom in 2024
Editing your photos in a photo editor like Lightroom can really take up some time. I myself faced this issue in the past that I had to spend hours just editing one of my photographs to make it look professional.
All my issues were resolved when I found out about the keyboard shortcuts and the top hidden features in Lightroom in 2024. Today I’m going to share those hidden features or hacks with you to help you elevate your editing experience to get professional results quickly.
Top Hidden Features in Lightroom
1. Inverted Mask Feature
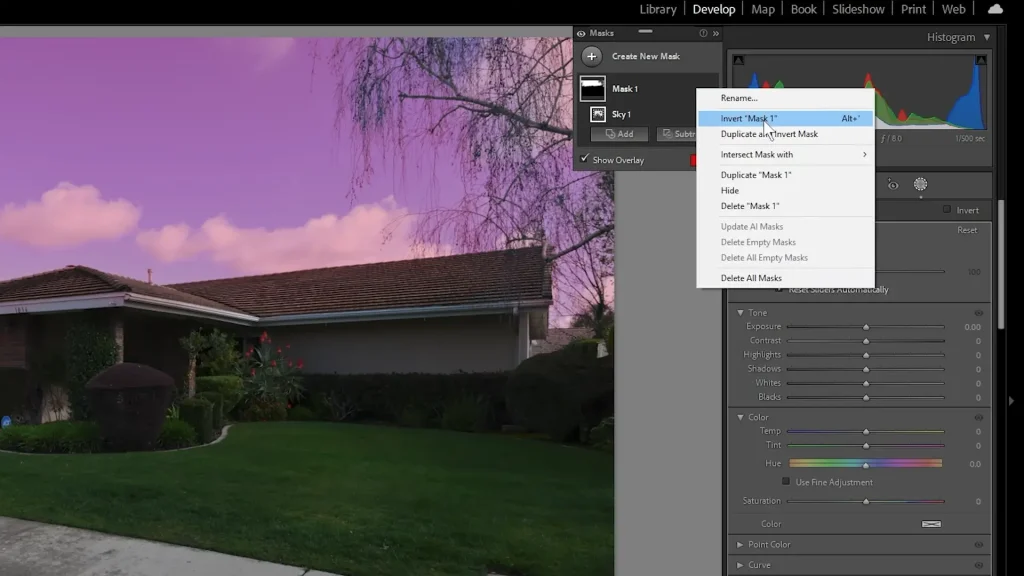
- The inverted mask feature in Lightroom is used for such photos in which the sky, landscapes or other sceneries are at the best view with maximum brightness but a specific part of the image has less exposure.
- To use this Hidden feature go to the masking tool, then select the sky, landscape option etc, and after that you have to click the 3 dots present with the mask.
- After that you will find an option named “invert”, click on it. You will see that except the sky, landscape or sceneries, all the other areas get selected.
- Now, you can easily edit the selected area to make it look better.
2. Snapshots
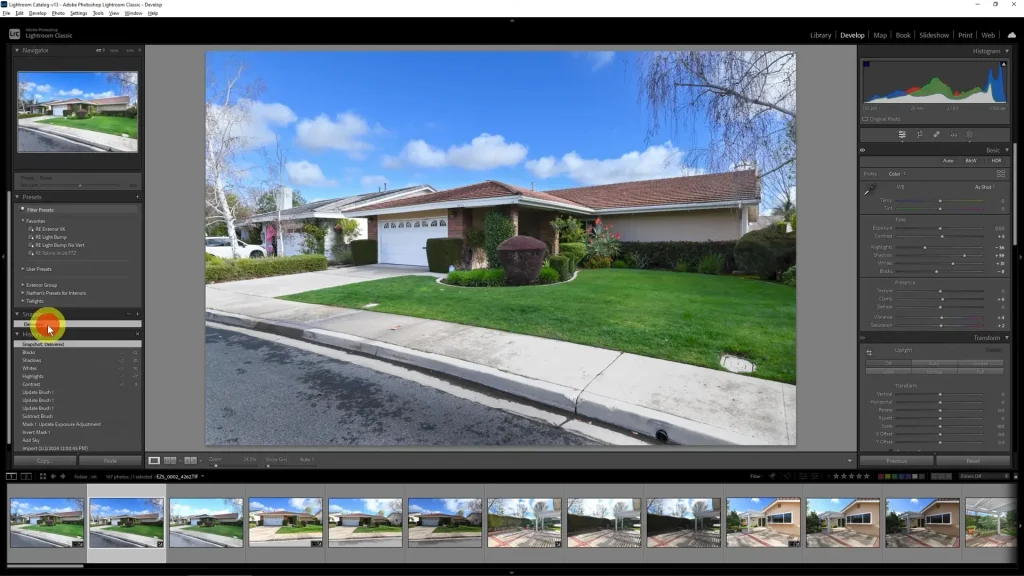
- Another great hidden feature of Lightroom is snapshots. This feature isn’t actually hidden, it appears in the left hand menu while editing your image in Lightroom Classic but people don’t notice this feature and its capabilities.
- The use of this feature is to preserve the steps through which you edit your images. Although these steps are saved in the History tab, still when you open a few steps in the history tab the recently saved steps start to disappear. This isn’t the case in Snapshots.
- To use this feature you just have to right click on a step in the history tab and then click on ‘create snapshot’. After that you can permanently save an editing step without the fear of losing it.
3. Histogram Feature
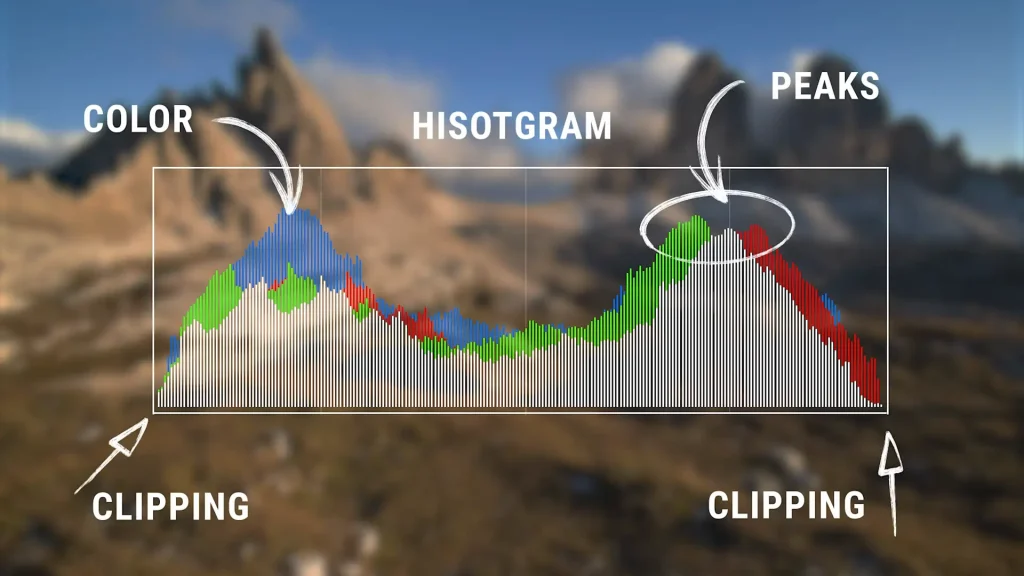
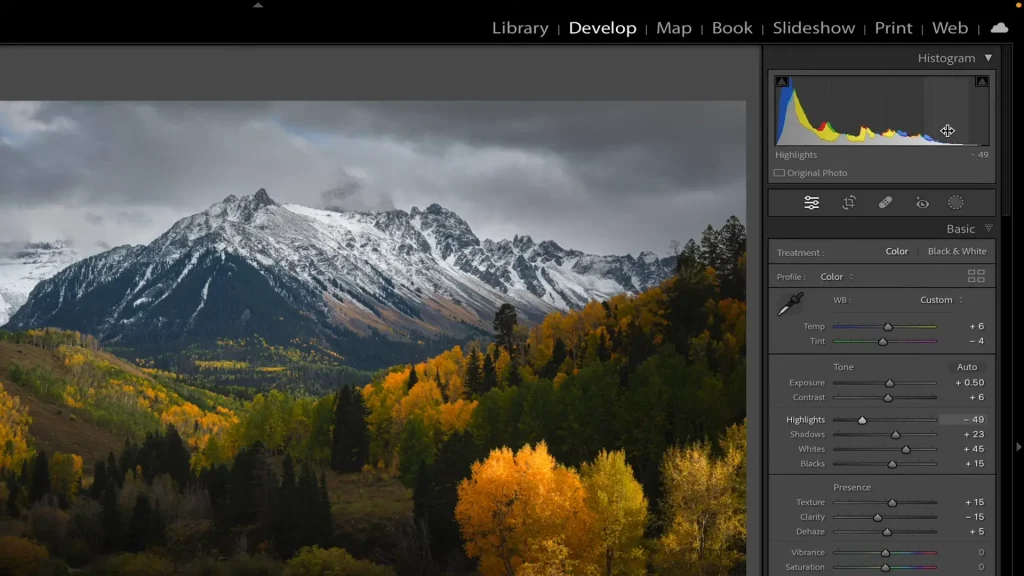
- This feature is great for editing sunrise and sunset photos but is often ignored by editors. When you hover on the Histogram graph, it shows you the part of the image being interfered with.
- When you click and drag a part on histogram, you’ll see that that part of the image automatically gets adjusted. For example, if you click and drag the ‘exposure’ part on histogram, it automatically gets adjusted.
- This saves you from the trouble of deciding which slider to adjust in order to make your image look good as histogram decides it for you.
4. Auto Adjustment Feature
- This feature is for beginners or for those people who get confused when it comes to choosing the best position of different sliders for a particular image.
- To use this feature all you have to do is to hold the ‘Shift Key’ and then double click on any slider option and you’ll see that the slider automatically gets adjusted at the best position.
- This adjustment is selected by Lightroom for you and its purpose is to provide you the best editing adjustment possible for your images.
5. Resetting Slider Adjustment
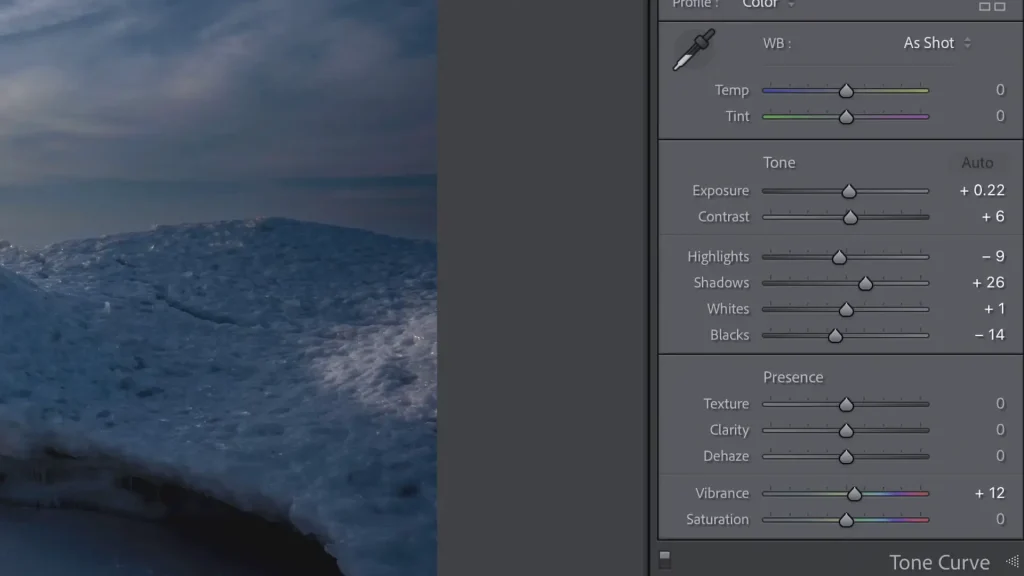
- This feature is used to easily remove any slider adjustment that you’ve done for any option.
- All you have to do is to click on any option that you’ve adjusted like ‘shadows’ and you’ll see that the slider automatically resets to 0.
6. Automatic Straighten
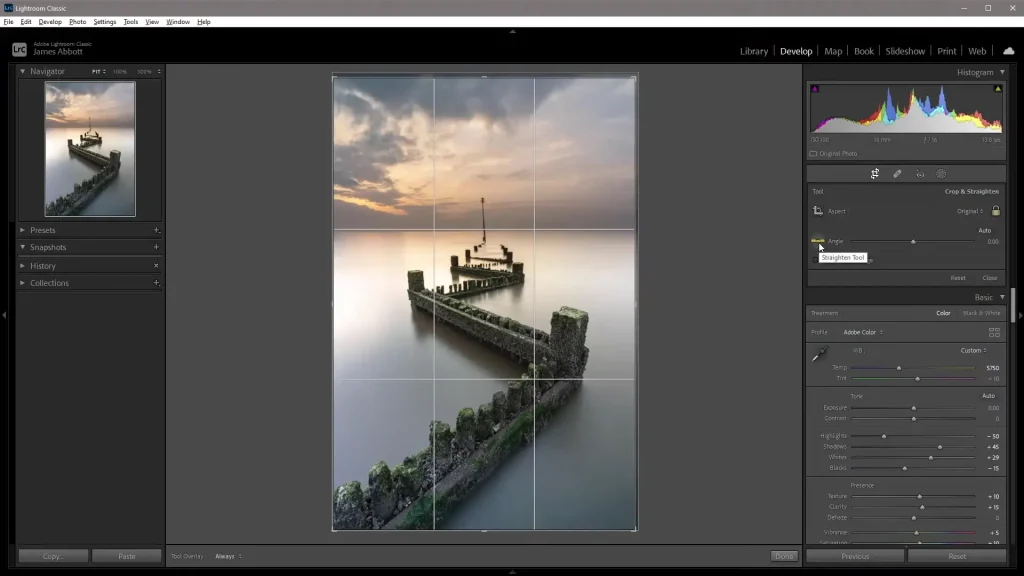
- Although you can manually straighten a tilted image in Lightroom, the results you get from that aren’t so accurate. So what you can do instead is that you can use the scale icon present with ‘angle slider’ under the Crop & Straighten tool.
- All you have to do is to drag the scale icon and place it on your image and then stretch it to create a straight line to give Lightroom a reference.
- After that Lightroom straightens your image itself.
Conclusion
These were the top features in Lightroom, which can really speed up your editing tasks and save up a lot of time. There are many more hidden features/hacks in Lightroom but in my opinion these features are the best ones and they really elevate your editing experience. Happy Editing!


