How to Blur Backgrounds in Adobe Lightroom? (Best Methods)
While editing your photos in Lightroom, you might come across a picture in which you or any other subject looks breathtaking but the background doesn’t match the vibe of your subject at all. Now all you have to do to make the photo look wholesome is to blur the background of the subject but you are confused how to do it.
I used to face the same confusion when it came to removing the background of my images in Lightroom. But after a lot of research and hours of editing on Lightroom, I now know how to blur backgrounds in Adobe Lightroom. And so today I’m going to share the best methods to do so.
Understanding The Concept
When it comes to blurring the background, there are more than one ways that you can adapt to in order to complete the task. But I’m only going to share the best and easiest methods with you.
Before we start, you have to keep in mind that there is no direct tool in Lightroom that is only dedicated to removing the background of your image, but there are few other ways to do so.
If you want a detailed guide on ‘Top Lightroom keyboard shortcuts’ then, click here.
Steps to Blur Backgrounds in Adobe Lightroom
Following are the steps to blur backgrounds in Adobe Lightroom on a PC:
- Import you photo
- Select the background
- Blur the Background
- Final touch ups
- Export your edited photo
Import Your Photo
The first thing that you need to do to blur the background is to select and then import a photo. Do it by following these steps:
- Open Lightroom app on your device.
- If your photo isn’t already in the device, move it in the device from your camera. You can also select it from cloud storage.
- Now, go to the Library module, select the image and then click the “Import” button at the bottom left corner.
Select the Background
You can select the background of you image using different methods:
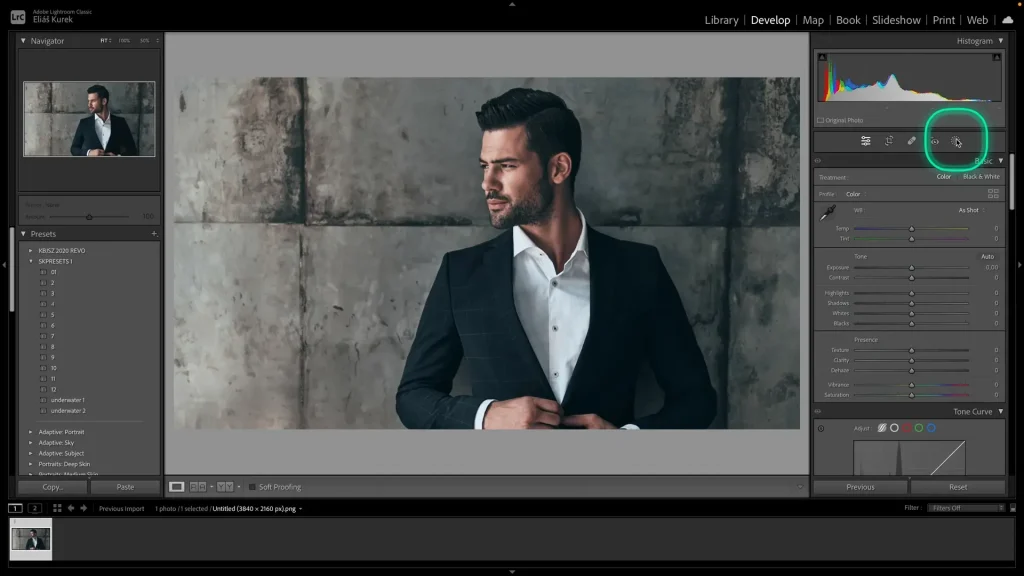
- Using the Mask Tool
The first way to select the background is by going to the “Mask tool>Background” and then the background will be selected automatically. If it doesn’t happen, then make sure the “select overlay” option is selected. There’s a chance that small portions of the background don’t get selected but don’t worry, we’ll solve that issue later.
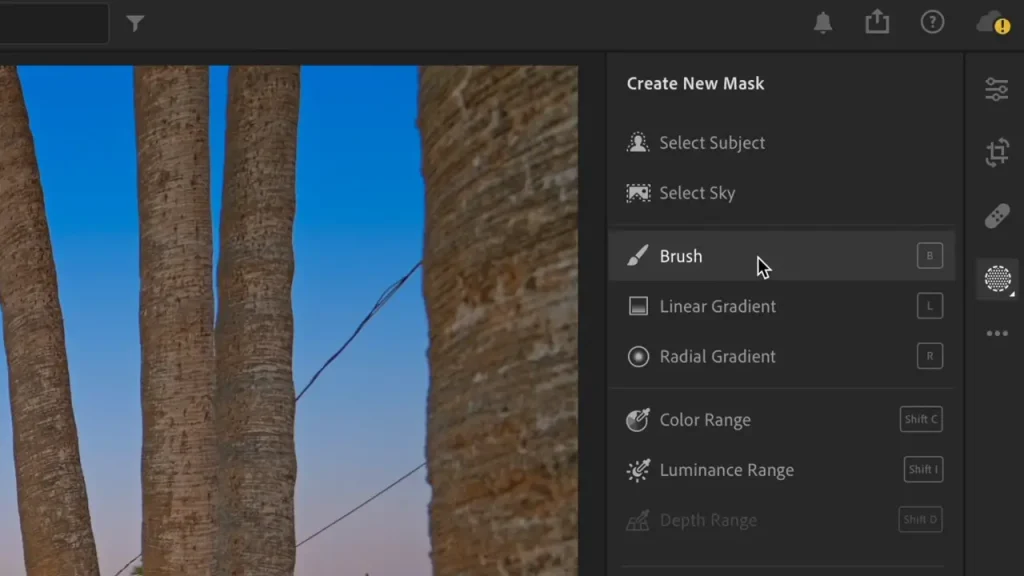
- Using the Brush Tool
Another method is to use the Brush Tool. Simply select a brush of your preferred size and then start selecting the background manually. The best way to select the background using the brush tool is to select a large brush to select the area away from the subject. And a smaller brush to select the background near the subject. The advantage of this method is that you can easily select the desired area without any small portions left behind.
- Use the Radial Filter
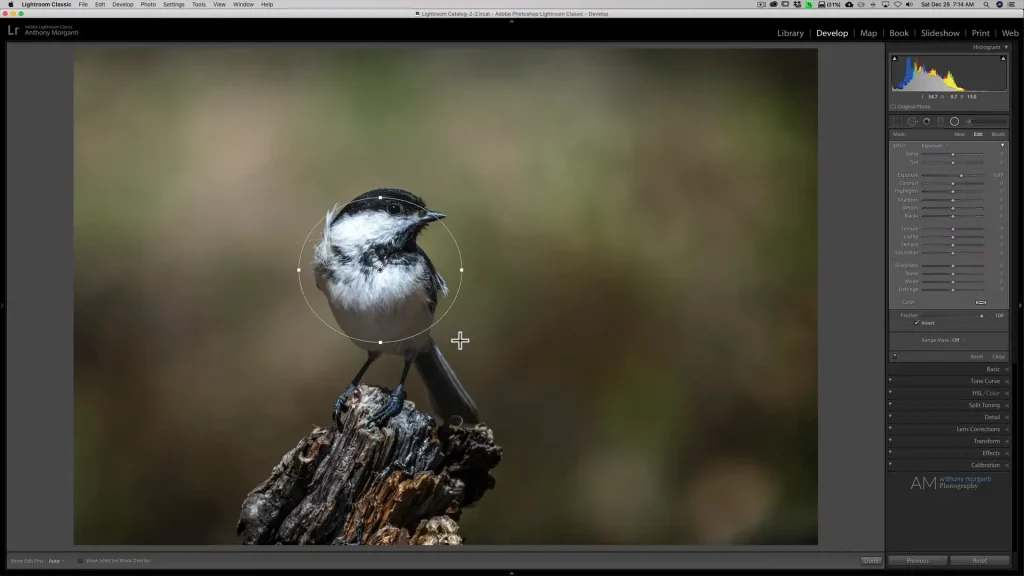
This method can only be used if the subject is in a round or oval shape. Select the Radial Filter Tool which is present on the right side of the screen. After that click the area of the image where you want the Radial filter to be placed. After the filter has been placed, you can customize its dimensions by clicking and dragging the control points to fit the subject of your image. You can also use the feather icon to set its dimensions efficiently.
- Use the Gradient Filter
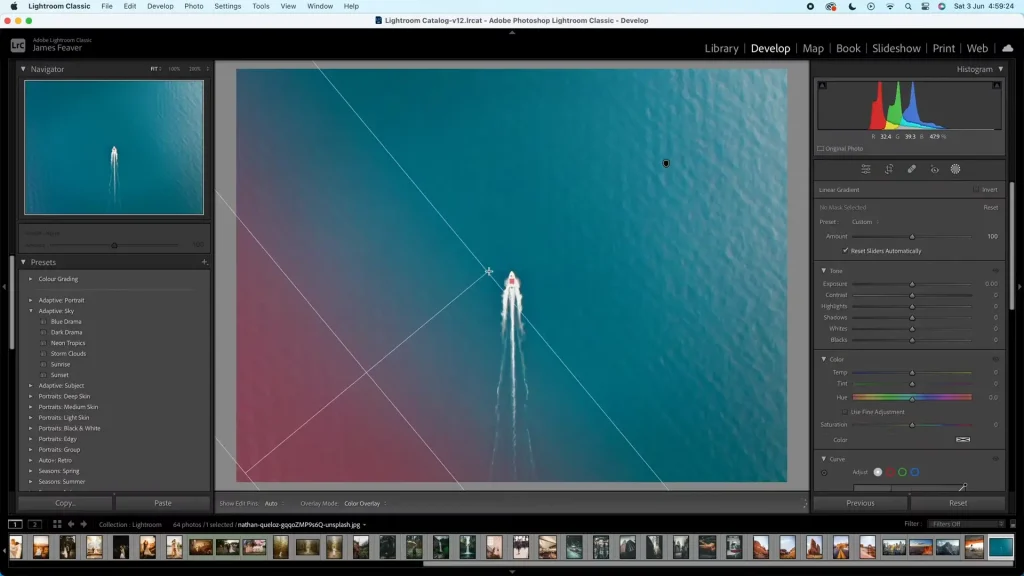
This Tool is used to blur the background of the image from center to outwards. Which kind of creates a rippling effect and gives the blur a natural look as all the at the center of the image is sharp and it gradually gets blurred outwards.
Locate the Gradient filter tool on the right side of the screen. After selecting the tool, select the point on the image where you want to place the gradient and then drag it until you reach the point where you want the blur to end. You can also customize its orientation and angle by using the control points present on it. One advantage of using the Gradient Filter is that it is really customizable as compared to other methods as you can adjust the saturation, exposure, contrast etc of the gradient.
Blur the Background
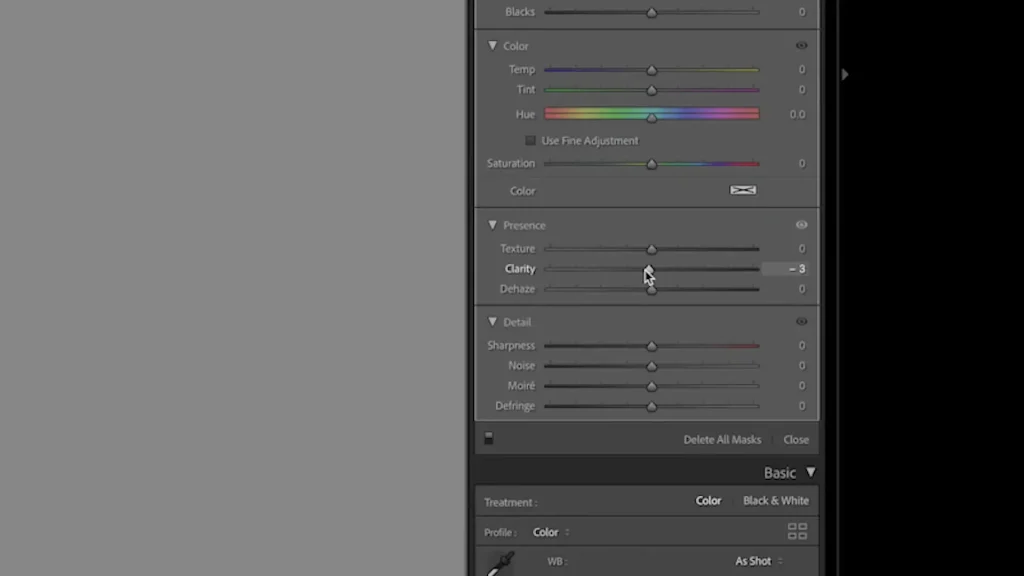
There are two options to Blur the selected backgrounds in Adobe Lightroom. One option only slightly blurs the background while the other option blurs the background to a higher extent. You choose any one or both options according to your preferences.
These options are actually the “Clarity Slider” & “Sharpness Slider”. The first one slightly blurs the background while the latter blurs the background to a higher extent.
Final Touch Ups
You might notice that small portions of the background aren’t blurred. This usually happens while using the Mask Tool. But this issue can easily be solved by using a thin brush to select the unaffected area and then applying the blur effect by adjusting the clarity and sharpness sliders.
Export Your Edited Photo
After the background of your image has finally been blurred, export the image by following these steps:
- First, go to the ‘File’ option
- Then click on the ‘Export’ option
- After you select the export option then:
- Select the location and then create a folder
- Choose the desired image format
- Set the quality of the image
- Select the color space that you want
- Name the file as you want
- Apply a watermark on the image if you have any
- At last, export the image by clicking the export button
Professional Tips
Comparison: If you are confused whether the blurred background looks good or not, you can view the images side-by-side in Lightroom.
Dehaze Tool: If your subject kinda gets submerged in the blurred background, you can use the Dehaze tool to create a definite separation between the subject and the background.
Blur Presets: If you regularly blur the background of similar kinds of images in Lightroom, you can save the blurring settings in the form of a preset. This will allow you to instantly blur the background of your photos in the future.
Blurring background with camera: If you take your photos with a camera, you can easily blur its background. The keypoint here is that the lower is the ‘f’ value of the aperture, the blurrier is the background. But if you don’t have a low ‘f’ value aperture make sure to keep the subject close to the camera or zoom-in on the subject to blur the background.
If you want a detailed guide on ‘Top hidden features in Lightroom’ then, click here.
How to Blur Backgrounds in Adobe Lightroom Mobile
The background blurring process in Lightroom mobile is similar to the desktop process:
- Select the image to blur the background of or simply take a new image and then import it in Lightroom.
- After the image has been imported, go to the menu and select the “Selective Mode” option and activate it.
- After it has been activated, choose one of the above mentioned methods to select the background.
- Then blur the background according to your preferences by sliding the Clarity & Sharpness options.
- Now, simply save the image and if you want then share it with the Adobe community or on social media.
Conclusion
In conclusion, even though there is no dedicated option in Lightroom to blur the background you can easily do so by following the above mentioned steps. If you don’t wanna get in a hassle then you can easily blur backgrounds by using online tools. These tools can blur backgrounds automatically in a few seconds but the results aren’t as professional as in Lightroom.
FAQs

