How to Smooth Skin in Lightroom? (Stepwise Guide)
We often take pictures that are breathtaking but when we zoom-in on them we see that our skin looks really rough and uneven. I used to experience this same issue but I don’t have to worry anymore because after hours of research I’ve found the best solution to smooth skin in Lightroom. In this article, I’m going to share this solution with you in the form of an easy stepwise guide.
To find out the top hidden features in Lightroom, click here.
Steps to Smooth Skin in Lightroom
Step#1: Removing the Spots
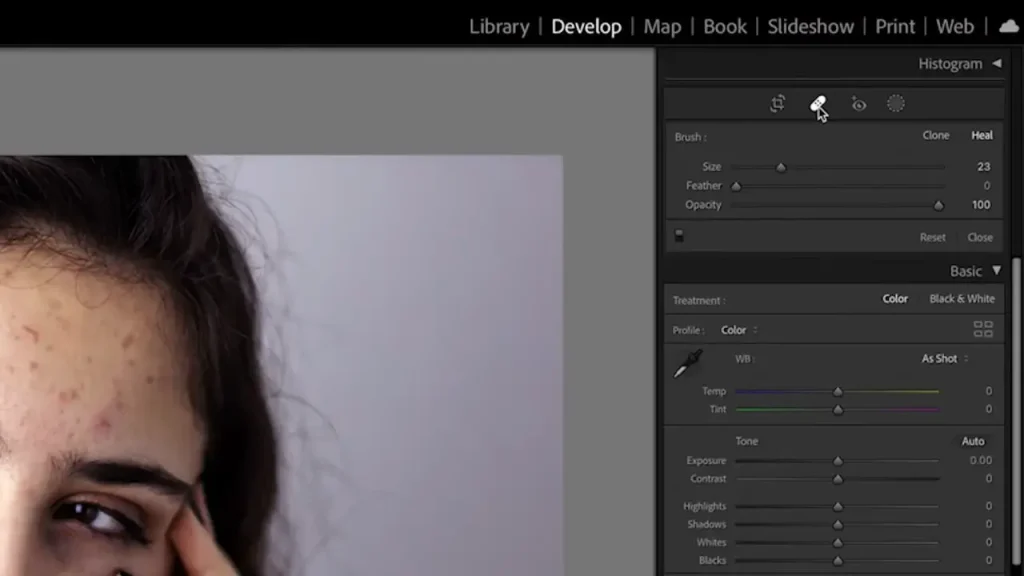
Firstly, you have to import your photo in Lightroom from the gallery and make basic adjustments to it as per your needs. After that there is one thing we need to do before smoothening the skin and that is to make the skin more clear. Doing this makes the smoothening step easy. To achieve a clearer skin go to the bandage tool in Lightroom. Following are the steps to use the bandage tool:
- Firstly, click on the Bandage tool on the right side of the screen.
- Upon clicking on this tool, another menu will open. From this menu select the Heal option.
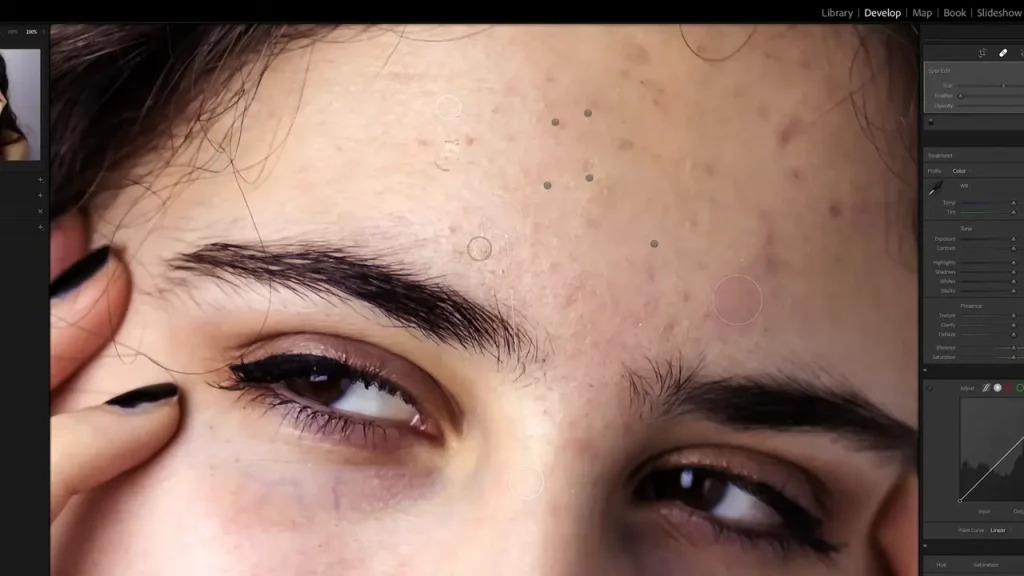
- After that locate all the pimples and spots on your skin and heal them with this tool.
- If you find it difficult to do so, make sure to zoom-in on your face to heal the pimples in a better way.
- Make sure to zoom-in and zoom-out while healing to check if the healing results look natural or not.
- Once all the pimples have been healed, You’re ready for the next step.

Step#2: Smoothening the Skin
The next step is to smooth your skin. This can be done in more than one ways, so I’m going to share the two best options with you to do so:
1st Choice:
In this option you have to smooth the skin with the help of Adjustment sliders and brushes. It can be done as follows:
- First of all, select the adjustment brushes from the right side of the screen on the toolbar. Keep in mind that you have to choose the perfect size for the brush. You can select the right brush size with the help of keyboard shortcuts.
- Now you have to select the whole skin on the face by sliding on it. Make sure that the eyebrows, eys, lips and other unwanted parts aren’t selected.
- You will see that the whole selected part will appear red. If that’s not the case then make sure that the ‘show overlay’ option is selected.
- After you have selected the skin area, there are three adjustments to smooth the skin:
- Sharpness: Use this slider to remove harshness from the skin.
- Clarity: Use this slider to make your skin appear soft.
- Texture: Use this slider to make your skin look really smooth.
- Slide towards the left on these sliders to increase their effect and slide them toward the right to decrease their effect.
- Like I said before, make sure to zoom-in and zoom-out to see the under and over smoothened areas of your skin.

2nd Choice:
The second option is the easiest way. The reason is that in this option Lightroom does most of the work and you don’t have to spend a lot of time. All you have to do is to use the Auto face selection option and a few more clicks will make your skin smooth.
- First of all, you have to select the Masking option which is available at the right side of the screen in Lightroom. After that, click on the skin of the person in the photo that you want to smoothen. With just one click, Lightroom’s AI recognition feature will select the desired parts of the skin itself.
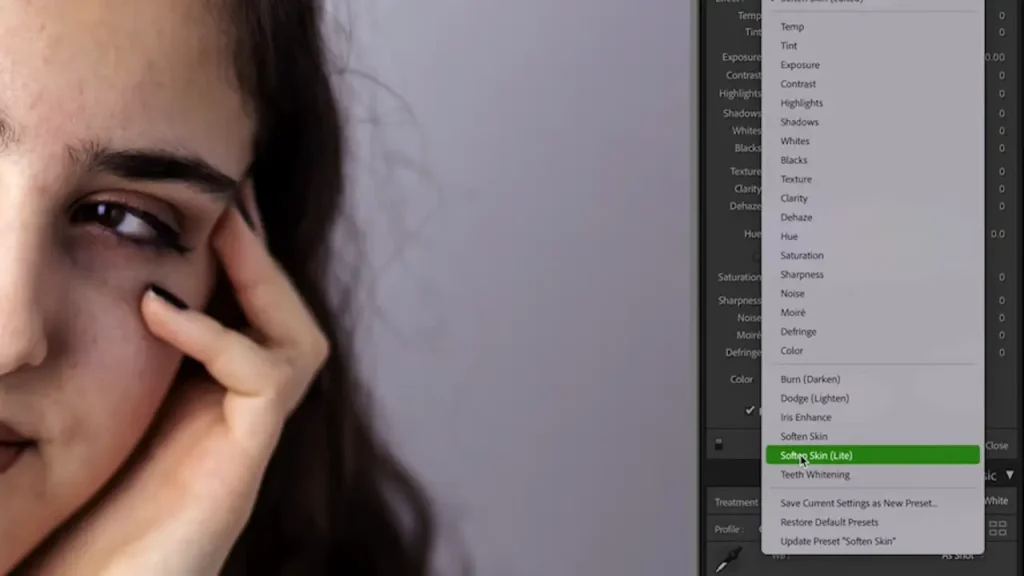
- Presets are the unique feature of Adobe Lightroom which will further help you in the smoothening process.
- The presets, ‘Soften Skin’ & ‘Soften Skin Lite’ presets are the best ones for this purpose. All you have to do is click on them and the skin will be smoothened automatically.
- After you apply this preset, a preset amount adjustment slider will appear at the bottom. You can adjust it according to your preference.
- When you select a preset like Soften Skin, the clarity and sharpness sliders are automatically adjusted. You can adjust them manually if you think the preset has done under or over smoothening.

Quick Summary of the Skin-Smoothening Steps
In summary, it is very easy to smooth skin in Adobe Lightroom. All you have to do is to make your skin clear first and remove the spots with the help of the heal tool in the Bandage option. Then zoom-in and zoom-out for accurate smoothening. After that choose between option one and option two to manually or automatically smooth your skin in Lightroom.
LEARN MORE: How to blur backgrounds in Lightroom?
Conclusion
Having smooth skin in your photos makes them even more attractive and Lightroom is the best tool available in the market to do so. It provides easy to use and free tools to achieve the desired results. These tools are making Lightroom the most trending editing software day by day. I myself use this tool for all my editing tasks and advise my readers to do the same. Happy Editing!


